A Beginner's Quick Guide To Creating Resin Art

The beauty of resin art is undeniable. With the number of things you can do with resin, like improving your home’s appearance (whether you’re creating a coaster, wall art, table, or even a small trinket tray), you won’t run out of ideas. Any project can help inspire creativity, no matter how big or small, while also allowing your home to look stylish.
As resin art piques your interest, you might want to begin your resin projects and allow yourself to be with beautiful works of art. You may consider browsing through Just Resin Gallery and other similar sites to get some inspiration about what type of resin project you wish to do. Yet before that, here’s a quick guide for resin art beginners:
Types Of Resin
When it comes to creating resin art, know that the type of resin you choose can affect the materials you’ll be using. This is because not every epoxy resin on the market is applicable for any project you’re planning to start. Thus, you need to know the type of resin that will fit your specific need:
- Deep Pour – This is for your large and thick objects or anything two-inch-thick for all sides. This would go well for your large pieces, such as paperweights, flower preservation, pen holders, and table. To achieve a polished project, you should do multiple layers by pouring in fractions and waiting for the first layer to dry before pouring on the next. While this might take longer, it could help achieve a more polished and even curing time for your project.
- Fast Curing – Fast curing would be your best option for smaller projects that aren’t too thick or only need a single layer to complete them. You can expect your pieces to cure faster because you’re only using a single layer. Moreover, you can even use this for your surface pour to add shine to your other resin projects. You can use fast curing for coasters, a small trinket tray, and a comb. UV resin falls into this type as it’s perfect for small pieces like jewelry and paper clips, and would cure under the UV lamp.
Safety Precaution
Resin can be harmful when inhaled in an enclosed area despite its beauty. Even if your resin doesn’t smell, it has toxic fumes that can cause allergies, skin irritations, or respiratory problems. Hence, prepare your workspace effectively to prevent any health hazards.
Ideally, you should work in a room with proper ventilation as much as possible. You can begin by opening your doors and windows and using a ceiling fan for adequate air circulation during your resin work.
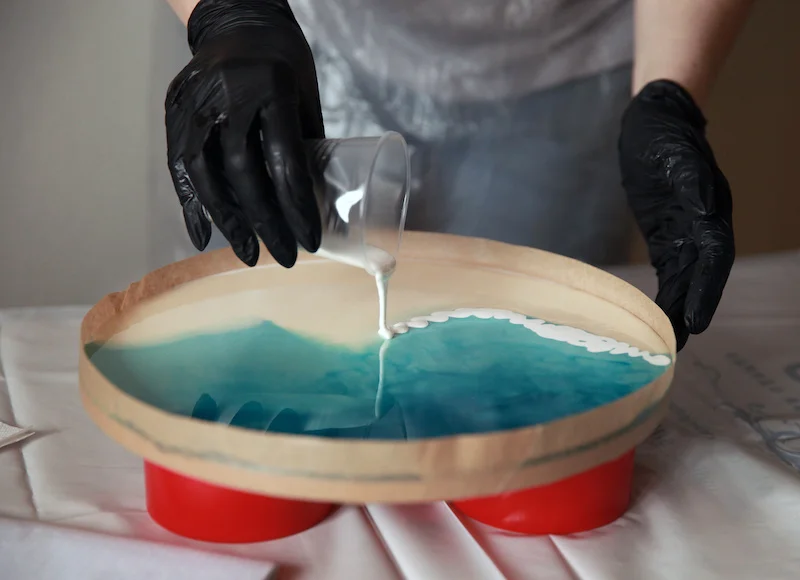
You should also wear proper gear as protection when working with resin art. To avoid inhaling toxic fumes, even in a well-ventilated room, you should wear a respirator mask to be safe. You should also wear nitrile gloves to protect your hands from possible skin damage. Likewise, you mustn’t touch the resin while it’s wet as its chemical composition is harmful to your skin.
Tools You Need
Doing resin art requires some tools to create various artworks. These would help craft beautiful and unique designs that will match the interiors of your home or for selling. Apart from resin, mica powder, gold flakes, and other decorative stuff, you need to purchase some tools to achieve a successful resin project:
- Silicone Molder – This is the main home of your resin as it’s where its form will take place. This will decide what kind of end product your resin project will have. Ideally, you should clean it and remove any dust before pouring your resin, which you can quickly achieve with cellulose tape (e.g., Scotch tape).
- Mixing Cup And Stirrer – These will help you blend your resin portions and combine your colors and shimmers. You should typically go for disposable paper cups, as cleaning reusable tools might be challenging, especially because you can’t wash them in the sink because they will clog your drains once it hardens.
- Heat Gun – This helps remove bubbles from your resin project. This should be directed to your resin while still wet. You can even use it to create the perfect waves if you plan to make a beach-themed resin.
Curing Time
The curing time for your resin would highly depend on how thick or large your object is. Your UV resin can take 5–10 minutes for small pieces (such as pendants and paper clips) and about 20 minutes under the UV lamp for larger pieces.
For your regular thin projects, such as your coasters, small trinket tray, or comb, you can wait for 24 hours before they finally cure.
Your deeper resin projects could take you at least 36 hours or longer before completely curing, especially because you’ll perform them layer by layer.
Furthermore, you mustn’t try to remove the resin from the silicone molder before its curing time. Although it might look cured at first glance, it might still be wet on the lower parts, so don’t get too excited to avoid damaging your project’s appearance.
Takeaway
Doing resin projects can be challenging because it entails safety measures. However, with the proper precautions, you can now move on to looking at beautiful pieces for inspiration and allow yourself to craft your first resin art project.
.jpg?resolution=760x0&quality=85&type=webp)
